Time Machine vs. Super Duper

Wednesday, October 31st, 2007
timemachinevssuperduper.png

The long (and short term) benefits of sunscreen backing up your data regularly has been nothing short of proven by scientists. The feeling of losing a photo, a document, or anything else irreplaceable is horrifying to me, and the fact that people some people still don’t back up their computers appalls me. Therefore, here and now, I could not be any more proud of Apple, who has made regular backup the centerpiece of Mac OSX Leopard. They call it Time machine, and the name is about as revolutionary as the approach.

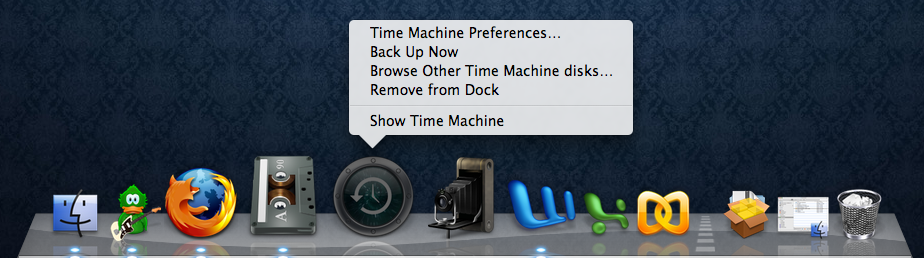
Time Machine, both automatically and regularly, backs up your data to an external drive invisibly, running in the background and keeping track of the files you delete. Hourly back ups for the past 24 hours, daily backups for the past month, weekly backups until your external drive is full.

This is extremely helpful, logical, and needed. But does this great feature render my favorite backup application - SuperDuper - useless? No. Here’s why:

Although Time Machine is a great approach to data backup, and is ideal for those looking for a quick and simple way to keep their data safe, one needs to remember what Time Machine doesn’t do. It doesnt create bootable backups, meaning that if ***knock on wood*** hard drive failure ever does occur, the process for system and file restoration after getting a new hard drive involves the following:

  1. Finding your Leopard Install Disc (if you even have it available)
  2. Reinstalling OSX (a couple hours if you install the languages)
  3. Restoring from a Time Machine Backup on your external

On the other hand, with your system backed up with SuperDuper, the restoration process involves the following:

  1. Booting you complete system from your external drive
  2. Running SuperDuper to copy your backup to your internal hard drive

As you can see, the SuperDuper restoration method is far superior for hard drive failure not only because it does not require any additional hardware (such as the Leopard Install DVD), but also because it gets you back into your fully functioning system immediately. By booting off of your external back up, you can delay getting a new hard drive if one is not available to you, and continue to work off of the external. With Time Machine, assuming you have your Leopard DVD with you (a pretty hefty assumption), you still have to go out and get a new hard drive, install it, and then sit and wait while Leopard completely reinstalls.

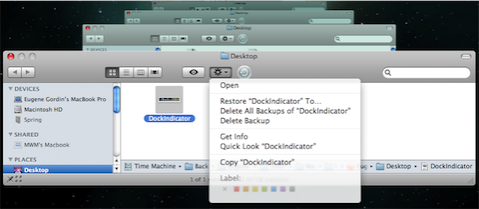
Now I don’t get me wrong Time Machine does everything it promises: it backs up your data for pretty much any unforeseeable disaster that can happen. In fact, Time Machine goes beyond this purpose, and allows you to retrieve individual files that you may have deleted some time in the past. This is not only quite amazing, its also something SuperDuper can do.

To make this even simpler, take a look at the stats:

compare.png

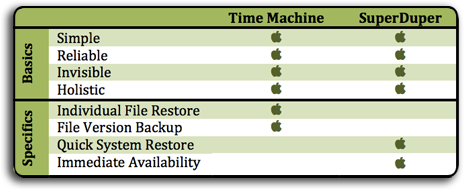
Alright, enough winding back and fourth. What’s the verdict? My belief is this:

  • If you use nothing else, use Time Machine out of pure simplicity
  • If you want quick recovery from hard drive failure, use SuperDuper
  • If you want both, use both.

What am I going to use? I will use both because I like the idea of restoring files I delete in the past and old versions of files. I also like my computer up and running immediately if it crashes. Using both lets me do both.

I hope that helps, and if you have any questions, let me know in the comments!

Note: At the time of this writing,SuperDuper is not yet compatible with Leopard. Once a Leopard compatible version is released I will update this post.


Leopard Tips

Friday, October 26th, 2007
leopard.png

Well Apple’s newest operating system is finally out. Mac OS X Leopard! And so far my experience with it has been more than positive. There are a ton of reviews out there, so I’m not going to get into what is so very cool about this new Operating System, but I do want to offer some tips and tricks. I plan on adding to these as I spend more time in Leopard, so do check back soon!

  • If you want to get Keyword Manager working with iPhoto, install the newest version of SIMBL first (here), and then install Keyword Manager. Works like a charm. If you already installed Keyword Manager, be sure to uninstall it first, then install SIMBL, and then reinstall Keyword Manager. The developers have released a new version of Keyword Manager that is compatible without additional SIMBL installation, but it is currently beta. You can find it here.
    keywordmanager1.png

  • If you want to choose the color of your menubar, and not have it depend on your wallpaper, you can get a program called LeoColorBar, which lets you choose any background color for your menubar for any wallpaper.
    leocolorbar.png

  • If you are not a fan of the new 3D dock and want the old Tiger one back, you can do so by getting an application called 2Dornot2D, which in addition to creative name and horrible icon allows you to switch between the different dock styles at the push of a button.
    dock.png

  • If you do not want an additional icon in your dock for Time Machine, there is a great and simple Dashboard widget called Time Machine Launcher that puts a button on your Dashboard to start Time Machine. Its available here.
    Time Machine Launcher

  • If you want to force Time Machine to do a backup, all you have to do is right click (or CMD+Click) on the Time Machine icon in the dock and click Back Up Now. You can also stop a Time Machine backup this way. So far this only works with the dock icon and not the above widget.
    forcetimemachine.png

  • If you want programs like Inquisitor and SafariStand to work, their developers have released updates that make them Leopard compatible. Other plugins can be enabled using PlugSuit. SafariBlock does not currently work with Leopard but the developer might release an update soon depending on several factors. I will elaborate as soon as I know more.
    inquisitor

  • If you find that bright white dock indicator to be a little too intrusive, there’s a great little modification that I found at MacThemes that fits nicely. Take a look below:
    dockindicator.png

  • If you want to delete a certain file or files from a specific or all Time Machine backup, you can do so by opening Time machine and finding the files or folders you want to remove from backup. Then select the file or folder and click the “gear” icon in the Finder toolbar. You will then have two options: 1) Delete All Backups of your file or folder or 2)Delete this backup.
    DeleteBackUp.png

  • If you mostly use Time Machine for finding files in Finder, and do not want to have a Time Machine icon in your dock to use it, you can add a Time Machine icon to your Finder toolbar. Just browse to Time Machine in your Applications folder and drag its icon to the toolbar and hold it over the toolbar for a second. You will see the other toolbar icons move over to make room for the Time Machine icon. You can also move the icon position by holding down the CMD key while clicking and holding any icon in the Finder toolbar. See the results below:
    TimeMachineFinderIcon.png

  • If you think the new Stacks feature is annoying or ugly, or simply unusable, you can mimic the Tiger dock folder behavior (partially) by creating an alias for the folder you want (right click and go to create alias), and then dragging it to the right side of the dock. This will not, however, allow you to browse the contents of the folder when you ctrl+click or right click. It simply give you a shortcut to the folder with an unchanging icon in your dock. Yes, I know, the arrow for the alias is ugly but not nearly as ugly as the icon for last thing you downloaded. UPDATE: If you want to get rid of the alias arrows, you can do so by following these directions. Heed the warning in the article however, because not being able to tell between alias’s and the actual folder they link to can get you in trouble!
    DownloadsAlias.png

That is all for now but check back soon because I’m sure I’ll find more helpful tips from around the web!